Introduction
 Waking up can be tricky. I'd heard good things about alarm clocks that light up gradually over about 30 minutes mimicking the sunrise from dull red to bright yellow light.
Many retail models are available with huge variation in price and review strength but for one with a respectable lumen count at the time of writing the price was ~ £100. What's worse, they all had garish front displays that you couldn't turn off and a very limited selection of wake-up music (or radio).
£100 seems an lot for something that's not quite right, surely?
Requirements
So, what are we building?
- A powerful lamp with a full range of colours and variable output
- A web-interface for setting the time, light profile, etc.
- A web-server for interacting with the light
Hardware
Host
There are various options for small boards running full linux distributions. I happened to have a slightly spurned but otherwise serviceable Raspberry Pi Model B lying around (it was replaced as a media server some time ago by a beefier B+ model) so I used that, but a cheaper option would be a Pi-zero that somehow will eventually cost $5!
Lights
At first I tried using some LED arrays that were powered directly from the Pi's GPIO pins, but that limited the choice to devices like the (otherwise super cool) LedBorg which wasn't nearly bright enough to wake me up.
This had two consequences:
- A more powerful led-strip was going to ~ double the budget.
- It would also require power source external to the Pi which would probably mean soldering.
Eventually I found the LPD8806 led-strip for £29 which like the Pi take a 5V supply, got a super cheap usb-wifi dongle for £2.47 and decided to try and power both the Pi and the led-strip from the same power supply (see diagram) using a 5V, 2A DC supply power supply for £5.99 using this converter for £2.26.
Soldering
Of course, the led-strip didn't have any connector, just four bare wires. This necessitated getting my hands dirty (and mildly singed) to create a very simple circuit connecting the rasberry-pi and the led-strip in parallel with the power supply, as shown below.
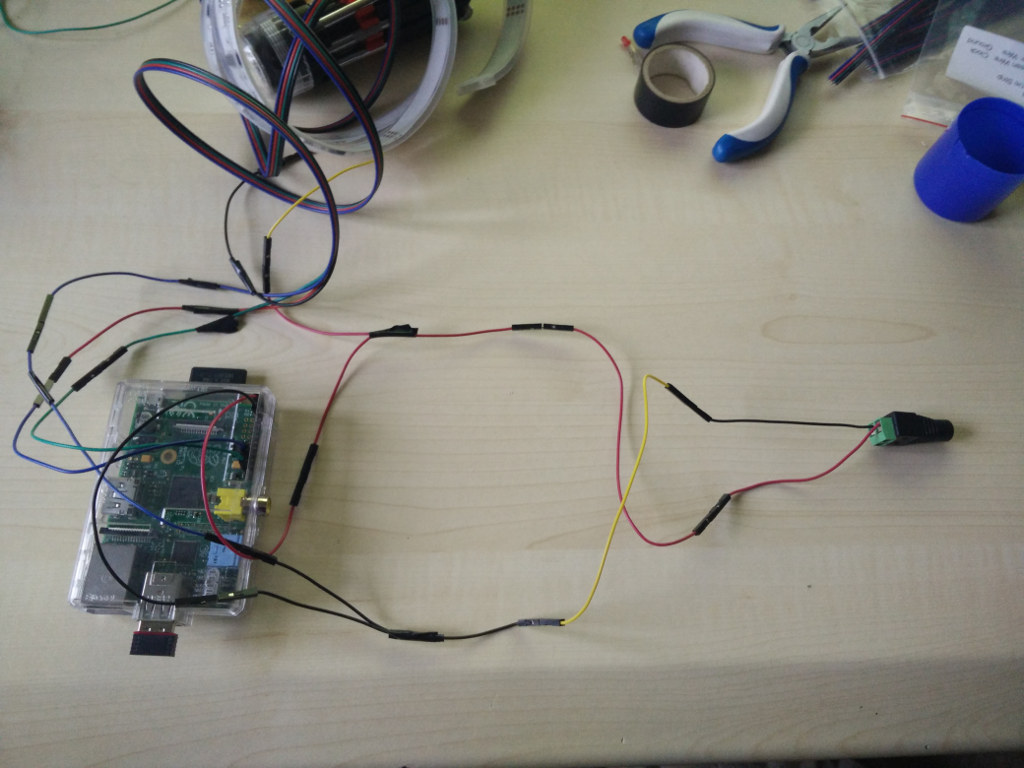
Be super careful when soldering not to create any short circuits or burn yourself. If you don't know what you're doing here learn about that first!
Software
I've made the project to control the led array, host the webserver, web-app and runtime management available here. If you don't care about software you can skip over to the install section.
Web-server
The web-server is a super simple Flask service which stores the application state (ie. what time and days of the week to go off) as a json document. It also hosts the web-app and directly controls the led-array.
Web-app
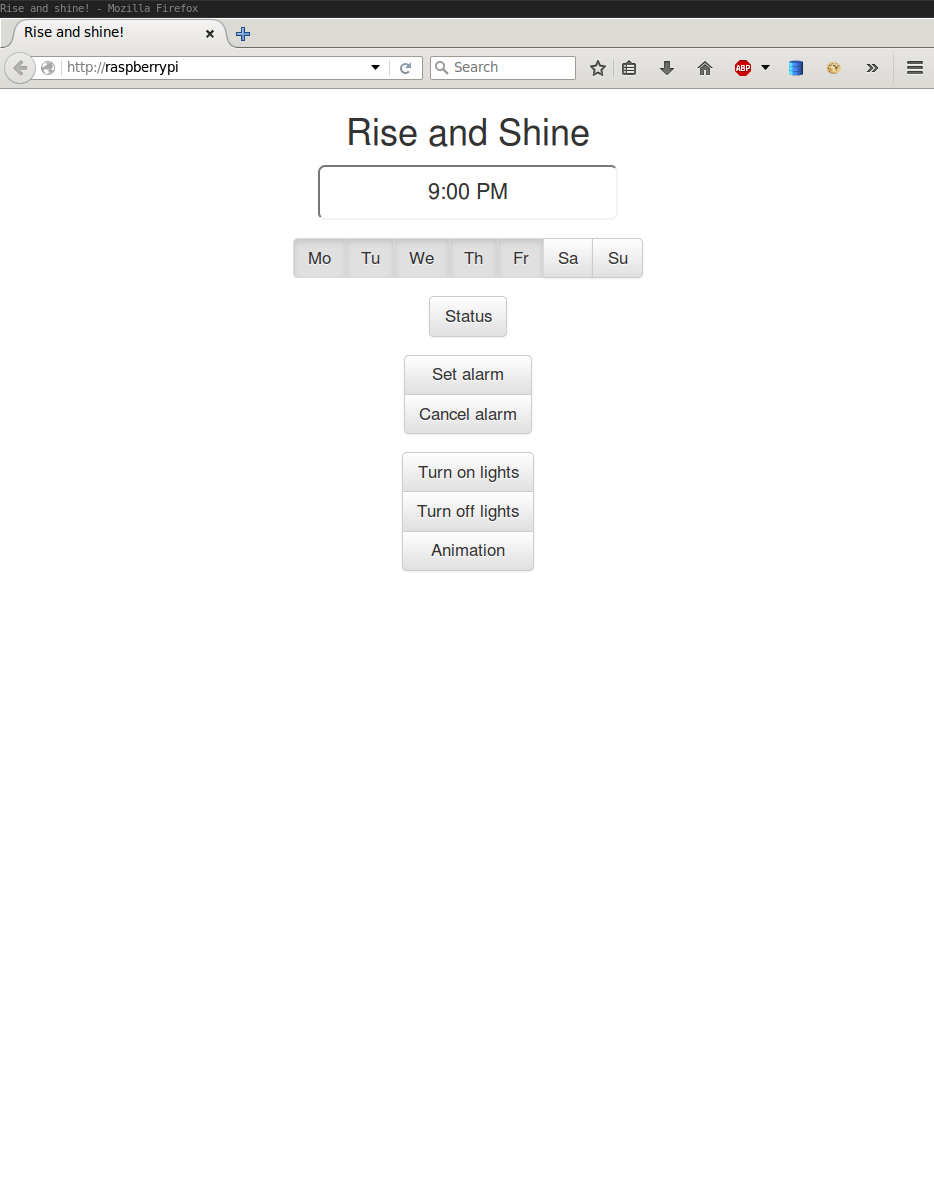
The web-app uses React and Bootstrap to show the, uh, minimal (and responsive) web-ui shown below. Clearly web design is very important to me.
Runtime-management
Some minimal runtime-management is needed to make sure the web-server start when the raspberry-pi is powered up and restarts if it's crashed. The Raspbian distribution still uses sys-v-init (since it's based on Debian-Jessie) so we use a sys-v-init script to do exactly that.
Generally sys-v-init is much fiddlier than more modern boot systems like the now deprecated Ubuntu upstart (which was great) or the much maligned systemd that will replace it in later debian distros but whatever, this works.
Installation
Enable SPI
By default the SPI bus on a raspberry-pi is disabled. Since we'll use to control the led-strip, first enable the SPI bus in the raspi-config which can be opened by:
sudo raspi-config
Project
To install all the project software (including dependencies) run the install script passing in the user and remote host at which your raspberry-pi is available on the network. For example, I have a user "pi" and the device has the hostname "raspberrypi" so to install server etc. I would do
> source install.sh pi@raspberrypi
If you now browse to http://raspberrypi on that same network you should now see the web-ui show above.
Disclaimer: in a more formal setting I'd be using Ansible for this sort of thing but somehow it didn't feel right given how janky the rest of the project is ;-)
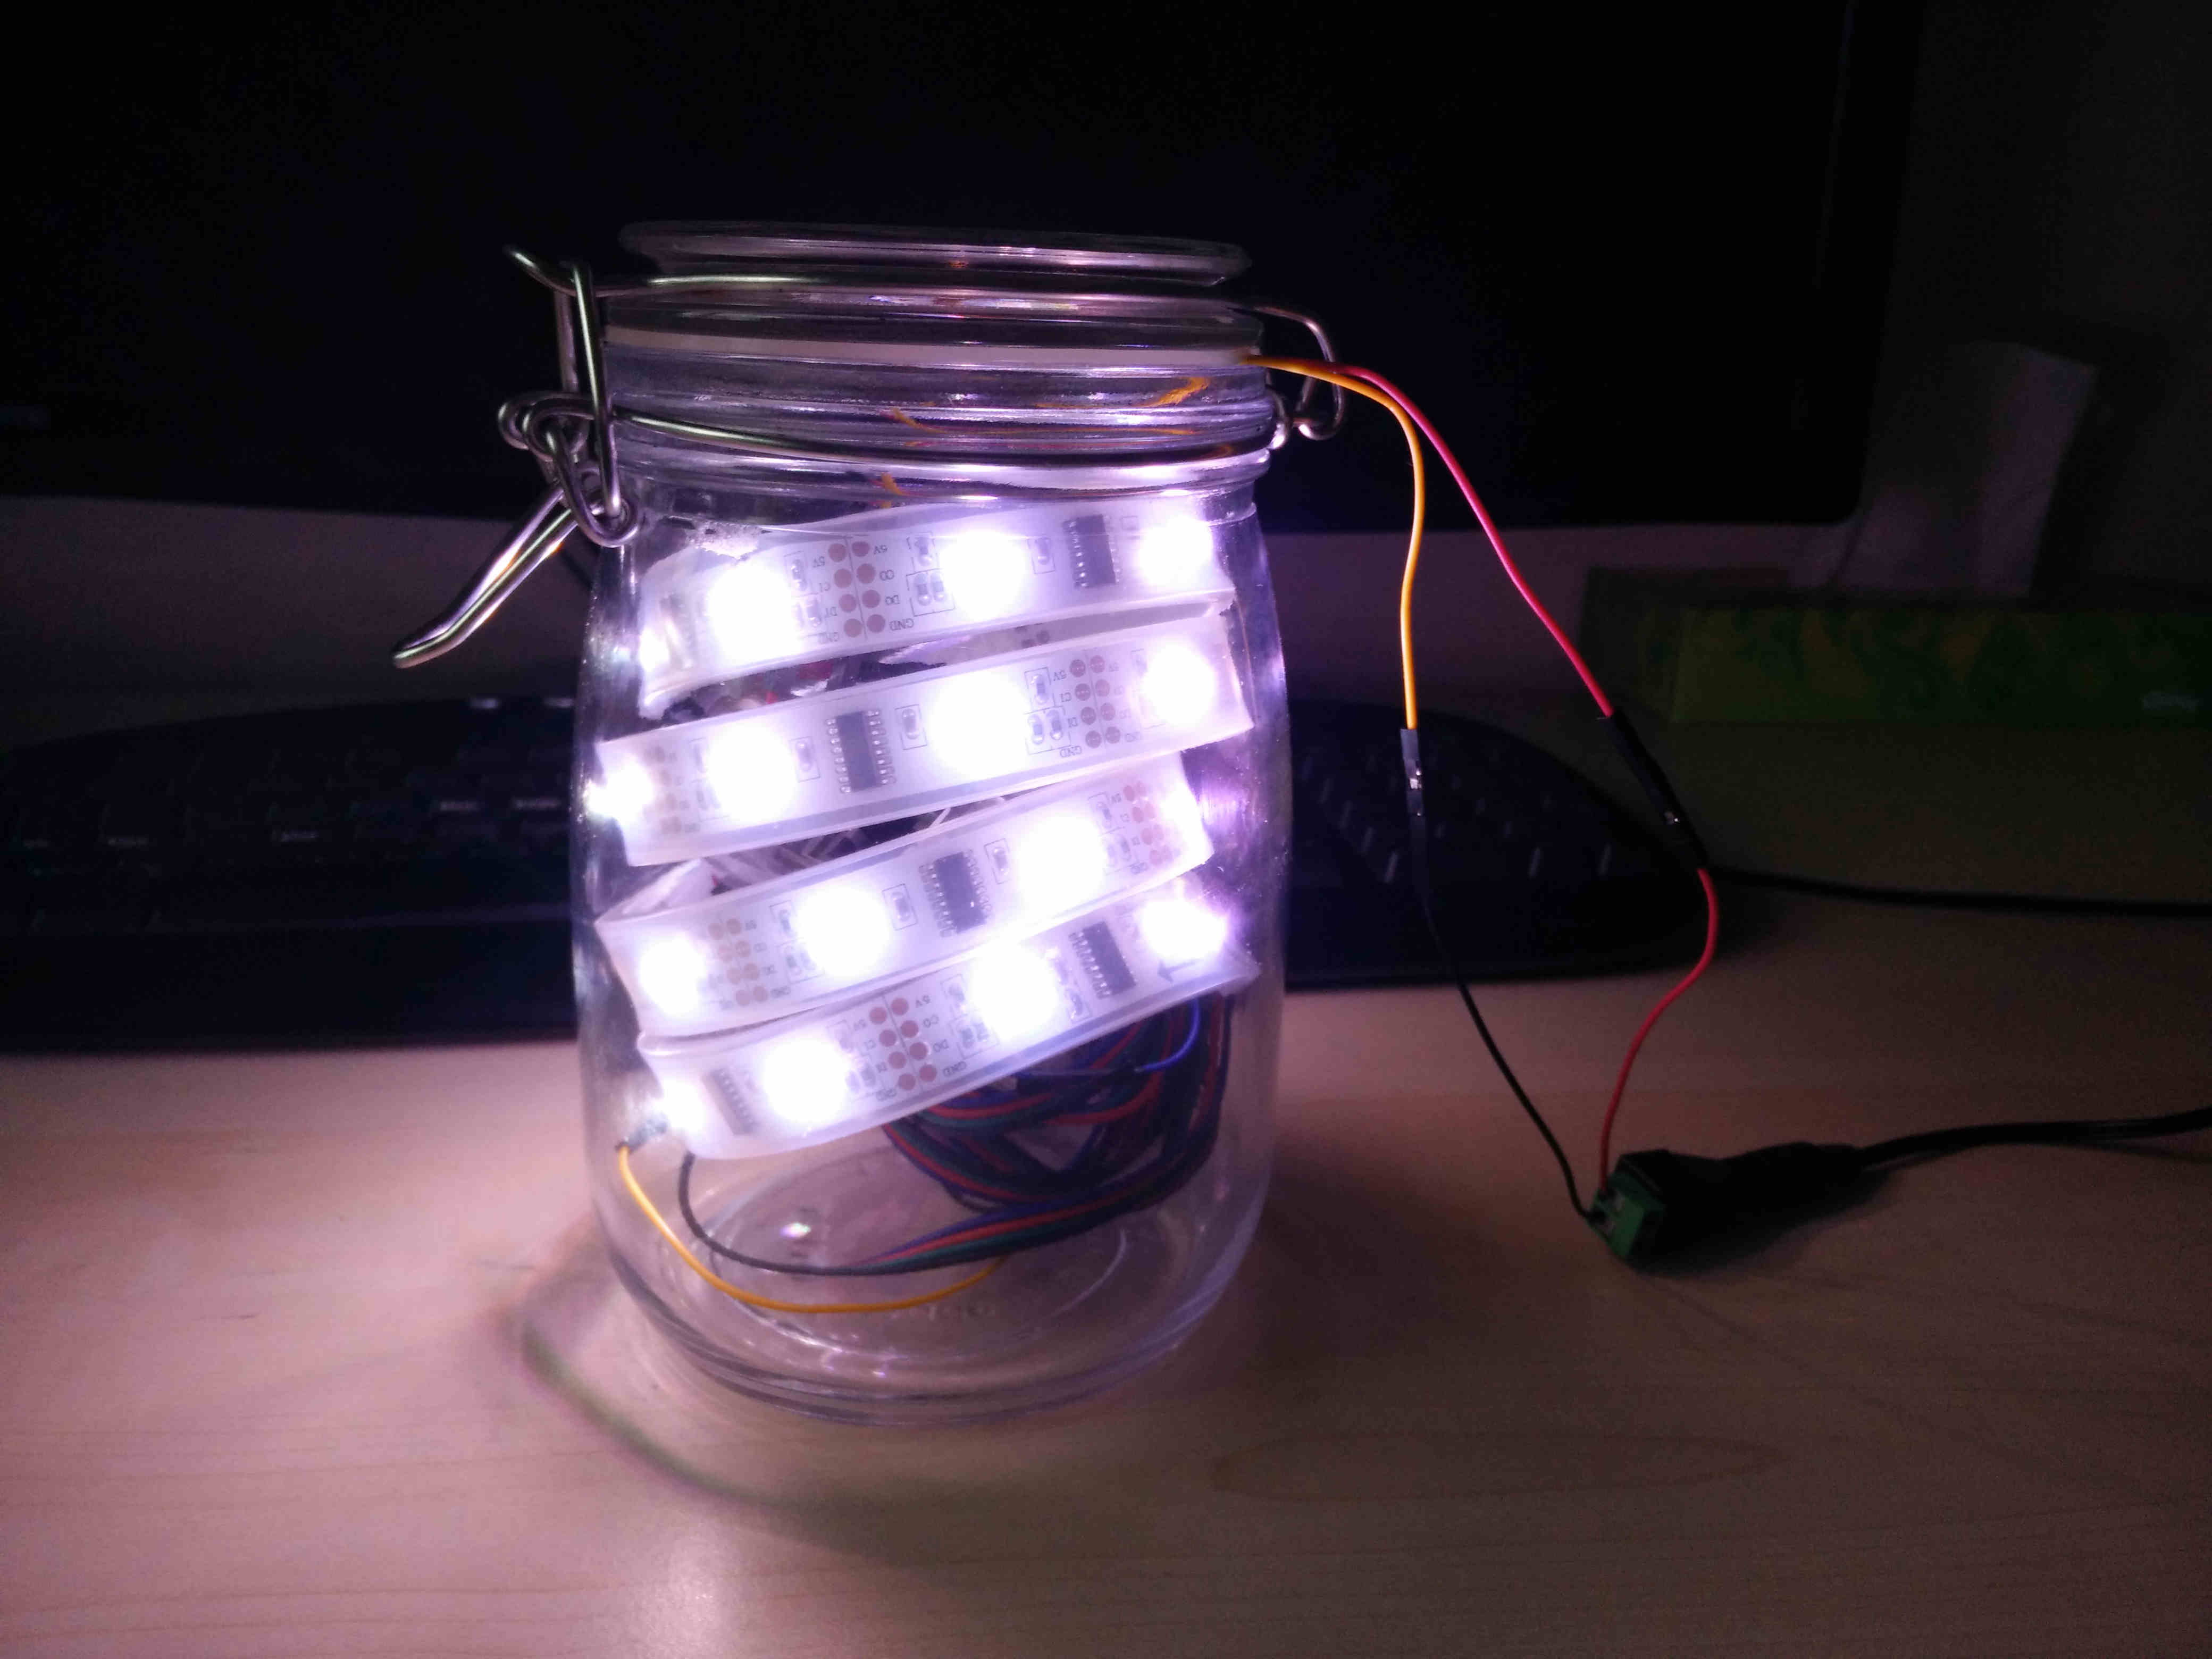
Result
In case you think I'm making all this up here it is.
Conclusion
I really enjoyed this Christmas project and would highly recommend it to anyone who feels like doing some hardware for a change. The total hardware cost was under £65, but using a pi-zero would reduce that by ~ £20 and now I have a sweet alarm-clock-in-a-jar!
I also believe it would serve as a good starting point for building something bigger with more lights with cooler animations since it hooks up a web-ui to the leds directly.
Go Top